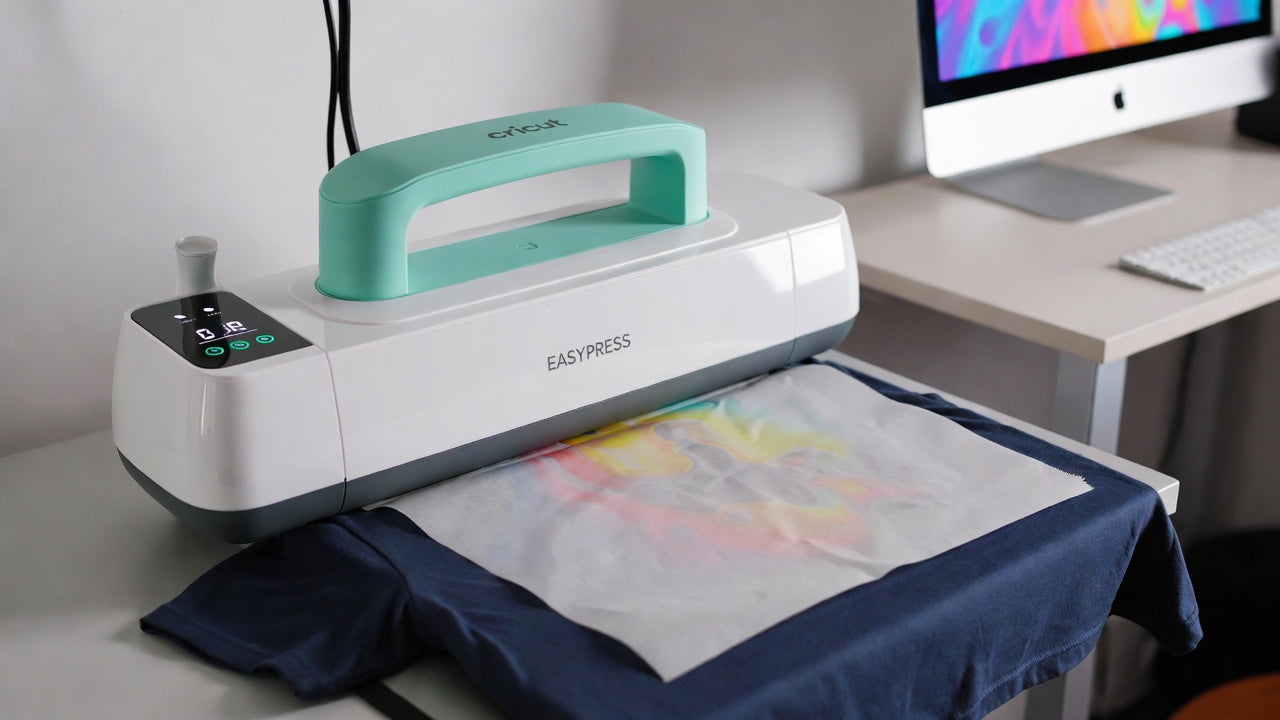
Cricut EasyPress is one of the most popular tools for home and small-business apparel printing.
If you’re using EZDTFMaker DTF transfers, the EasyPress gives you consistent heat, solid pressure, and reliable results — without needing a full heat press setup.
This guide walks you through exact settings, placement tips, and troubleshooting, so every transfer bonds cleanly and lasts wash after wash.
Why Use a Cricut EasyPress for DTF Transfers?
EZDTFMaker transfers work extremely well with EasyPress because:
- Even heat across the platen
- Simple temperature control
- Portable and beginner-friendly
- Strong bonding without overthinking
With the right settings, EasyPress results can match professional heat presses.
Recommended EasyPress Settings
Before you start, dial in your machine:
-
Temperature: 320°F–340°F
-
Pressure: Firm, steady pressure
-
Press Time: 20–25 seconds
-
Peel: Hot or cool (both work)
💡 Tip: Every EasyPress runs slightly different. One quick test press saves time and reprints later.
What You’ll Need
- Cricut EasyPress
- EZDTFMaker DTF transfer
- Garment (cotton, poly, or blend)
- Flat pressing surface
- Silicone garment protector or parchment paper
No pre-press required.
Step-By-Step: Applying EZDTFMaker Transfers with EasyPress
Step 1: Position Your Design
You do not need to pre-iron your shirt. EZDTFMaker transfers stick cleanly without it.
Place your design using these general placement rules:
-
Adult tees: 3–4 inches below the collar
-
Youth tees: 2–3 inches below the collar
-
Back prints: About 1 inch lower than the front
If you’re unsure:
- Press one test shirt
- Try it on
- Adjust once — after that, placement feels automatic
For long-term consistency, many users use a Pressing Alignment Set with guides for:
- Adult
- Youth
- Toddler
- Infant
- Extended sizes (2X–6X)
Step 2: Press
Set your Cricut EasyPress to 320°F–340°F and press for 20 seconds.
- Cover the transfer with a silicone garment protector
- Apply firm, even pressure
- Hold the EasyPress steady — do not slide
If the transfer doesn’t grab well:
- Increase temperature in 15°F increments
- Re-test until it locks in
You cannot overpress DTF.
Better pressure = stronger wash durability.
Step 3: Peel (Hot or Cool)
EZDTFMaker film peels clean hot or cool.
- Wait a few seconds
- Peel slowly and smoothly
If any corner lifts:
- Lay the film back down
- Press again with more pressure
- Increase heat by +15°F
Re-pressing will not damage the transfer.
Step 4: Final Press (Do Not Skip This)
The final press makes a big difference.
- Cover the design with parchment paper or a thin layer of shirt fabric
- Press again for 20 seconds using the same settings
This step:
- Softens the print
- Improves long-term durability
- Removes unwanted surface shine
✨ Prefer a glossy finish?
Use a Protective Guard Sheet instead of parchment.
Washing & Care Instructions
To keep prints looking fresh:
- Wash inside out
- Cold water recommended
- Low heat or hang dry
DTF transfers are durable, but gentle washing extends lifespan — especially on detailed designs.
Common EasyPress Mistakes to Avoid
- Not applying enough pressure
- Sliding the EasyPress while pressing
- Skipping the final press
- Using uneven surfaces
Fixing these instantly improves results.
EasyPress vs Heat Press for DTF
EasyPress is perfect for:
- Home businesses
- Etsy sellers
- Small batches
- Portable setups
Heat press is better for:
- Bulk orders
- Production speed
- Daily printing
Both work — EasyPress just keeps things simpler.
Why EZDTFMaker Transfers Work So Well with EasyPress
- Strong adhesive bonding
- Clean hot or cool peel
- Forgiving on re-press
- Excellent stretch and wash resistance
Designed for creators, not just factories.
Final Thoughts
With the right heat, pressure, and technique, EZDTFMaker DTF transfers apply flawlessly using a Cricut EasyPress.
Follow this guide once, test your settings, and you’ll get consistent results every time.
Ready to Print Your Designs?
Order Custom DTF Transfers