Not everyone owns a heat press — and that’s completely fine.
With EzDTF Maker DTF transfers, you can still get strong, clean, and long-lasting results using a regular household iron.
This guide is written for beginners, home printers, and small businesses who want reliable results without expensive equipment.
Can You Apply DTF Transfers with an Iron?
Yes.
EzDTF Maker DTF transfers are designed to work with both heat presses and household irons.
The key is:
- Enough heat
- Firm pressure
- Correct timing
- A proper final press
Follow the steps below, and you’ll get results that hold up in the wash.
What You’ll Need
Before you start, gather the following:
- Household iron
- EzDTF Maker DTF transfer
- Garment (t-shirt, hoodie, etc.)
- Parchment paper or silicone garment protector
- Thermal heat tape (recommended)
- Flat, sturdy pressing surface (table or counter)
⚠️ Avoid ironing boards if possible — they absorb pressure and reduce bonding.
Iron Heat Settings (Very Important)
Set your iron to:
- High heat (Cotton / Linen setting)
- Steam OFF
You need dry heat and firm pressure for DTF transfers to bond correctly.
Step-By-Step: Applying EzDTF Maker DTF Transfers with an Iron
Step 1: Position Your Design
Take your time here — placement matters.
- Line up your design exactly where you want it
- Smooth out the fabric so nothing shifts
- Use thermal heat tape to secure the transfer
This is especially important with an iron since you won’t be sliding it around.
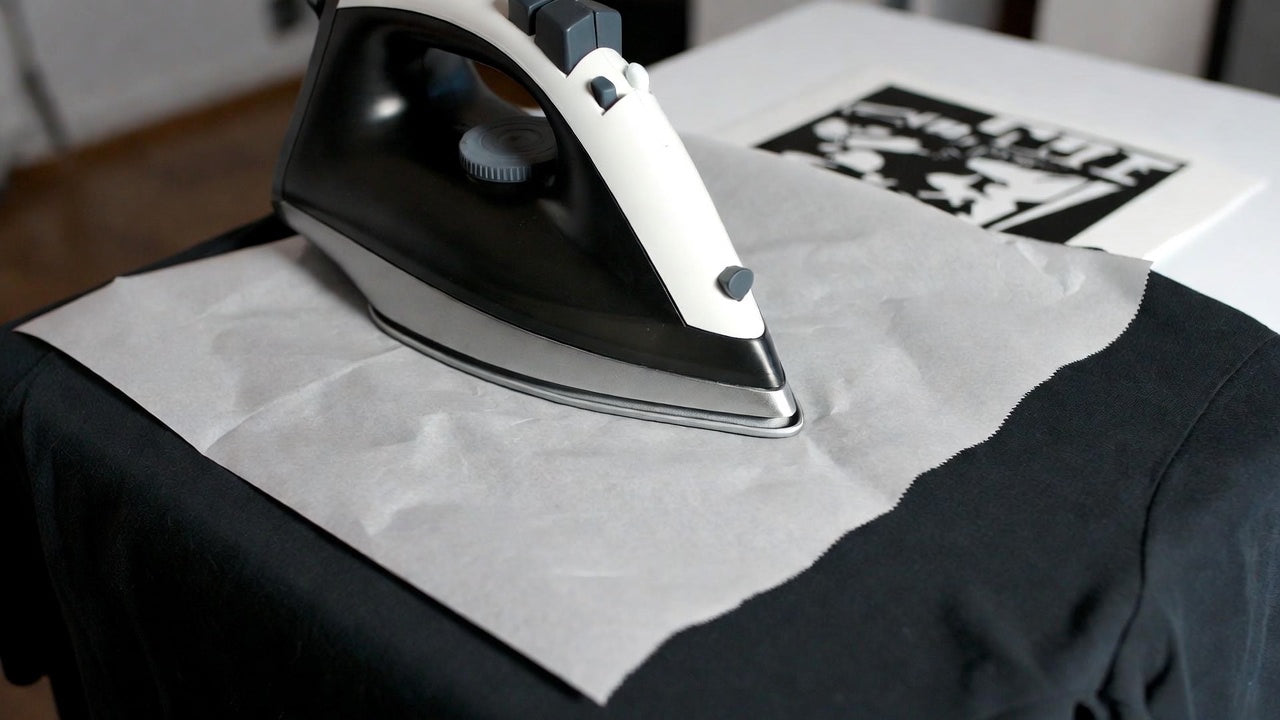
Step 2: Press (Do Not Slide the Iron)
Place parchment paper or a silicone protector on top of the transfer.
- Hold the iron firm and steady
-
Do not slide the iron
- Apply strong downward pressure
- Press for 20–25 seconds
If the transfer doesn’t grab well, increase heat gradually — up to the highest safe setting for the fabric.
Step 3: Peel (Hot or Cool)
After pressing:
- Let it cool for about 5 seconds
- Peel the film slowly
EzDTF Maker transfers support both hot and cool peel, so use what feels easiest.
If any area lifts:
- Lay the film back down
- Press again with more pressure and slightly more heat
Re-pressing will not damage the transfer.
Step 4: Final Press (Do Not Skip This)
This step makes a huge difference in durability.
- Cover the design with parchment paper or a thin cotton cloth
- Press again for 15–20 seconds
- Hold steady with firm pressure
This:
- Softens the print
- Improves wash resistance
- Evens out the finish
✨ Want a smoother or shinier look?
Use a protective guard sheet during the final press.
Wash & Care Instructions (Iron-Applied Transfers)
Because an iron applies less pressure than a heat press, proper care matters.
For best results:
- Wash inside out
- Cold water
- Hang dry if possible
If using a dryer:
Cold washing helps keep colors sharp and edges clean longer.
Common Iron Application Tips
- Every iron is different (heat, weight, pressure vary)
- Always test once on a spare garment
- Once settings work, stick with them
- You cannot overpress DTF — stronger bonding always wins
A well-pressed transfer lasts longer and looks better.
When to Upgrade to a Heat Press
Iron application works great for:
- Home use
- Side hustles
- Small batches
If you’re doing:
- Daily orders
- Bulk production
- Multiple garments per day
A heat press will save time and effort — but irons are a solid starting point.
Why EzDTF Maker Transfers Work So Well with an Iron
- Strong adhesive powder
- Even ink layers
- Clean peel performance
- Beginner-friendly results
Designed to help you succeed — even without professional equipment.
Final Thoughts
You don’t need expensive machines to get professional results.
With the right heat, pressure, and technique, EzDTF Maker DTF transfers apply cleanly using a household iron.
Take your time, follow the steps, and press with confidence.
Ready to Print Your Designs?
Order Custom DTF Transfers