affordable DTF printing

How to Convert an Epson Printer for DTF Printing (Step-by-Step Guide)

How to Convert an Epson Printer for DTF Printing (Step-by-Step Guide)

Converting an Epson printer for DTF printing opens up exciting possibilities for creating vibrant, durable transfers on fabric and other materials. This comprehensive guide is designed for small business owners, crafters, and entrepreneurs who want to expand their printing capabilities without investing in expensive specialized equipment.

DTF (Direct-to-Film) printing has become increasingly popular because it works on virtually any fabric type and produces professional-quality results. By converting your existing Epson printer, you can start producing custom apparel, promotional items, and personalized gifts at a fraction of the cost of buying dedicated DTF equipment.

In this step-by-step tutorial, you'll learn how to select the right Epson printer model and gather all necessary conversion materials. We'll walk you through the complete installation process for DTF ink systems and show you how to optimize your software settings for perfect prints every time. You'll also discover proven troubleshooting techniques to solve common issues that arise during and after conversion.


Understanding DTF Printing and Epson Printer Compatibility


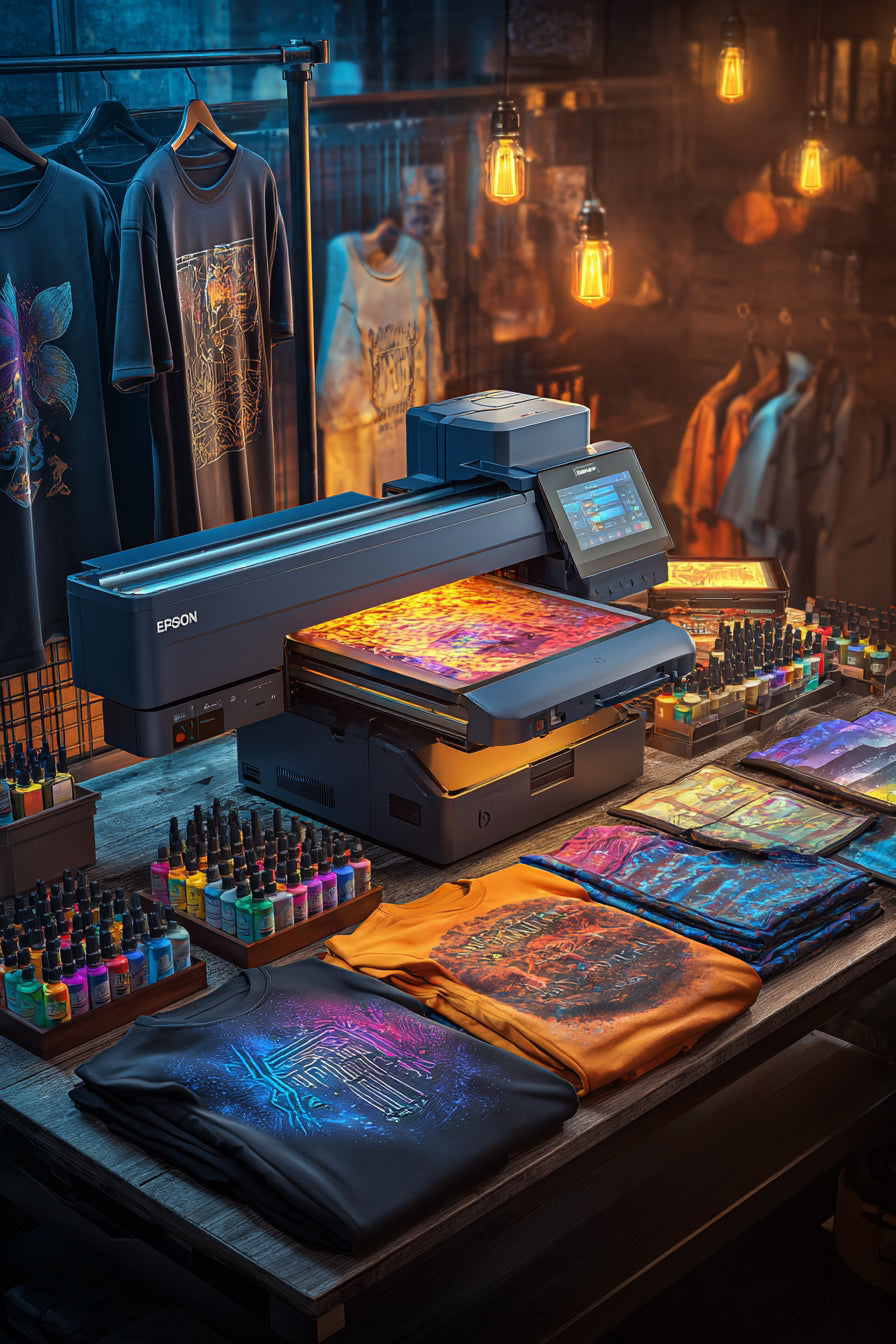
What is DTF printing and why choose Epson printers

DTF (Direct-to-Film) printing is a revolutionary heat transfer method where designs are printed directly onto a special PET film using DTF inks, covered with hot-melt powder, cured, and then heat-pressed onto various fabrics. Unlike traditional methods that require specific fabric types, DTF works on cotton, polyester, blends, leather, and even hard surfaces.

Epson printers dominate the DTF conversion market for several compelling reasons. Their piezoelectric printhead technology delivers exceptional precision and durability compared to thermal printheads found in other brands. The ink droplet placement accuracy creates sharp, vibrant prints that maintain quality even after multiple washes.

Epson's wide color gamut capability produces stunning color reproduction, especially important when printing complex designs with gradients and photographic elements. The printers handle thick DTF inks without clogging issues that plague other brands. Many Epson models also feature individual ink cartridges, making maintenance and color replacement more economical.

The printhead longevity in Epson printers significantly reduces long-term operating costs. While other printers might require printhead replacements after heavy DTF use, properly maintained Epson printheads can handle thousands of DTF prints without degradation.

Compatible Epson printer models for DTF conversion

Not all Epson printers work equally well for DTF conversion. The most successful conversions use specific models designed to handle thicker inks and frequent printing cycles.

Desktop Models:

Epson EcoTank ET-2720/2760: Entry-level options perfect for small businesses

Epson EcoTank ET-4760/4850: Mid-range models with excellent print quality

Epson EcoTank ET-15000: Large format A3+ printing capability

Epson Expression Home XP-4100: Compact option for hobbyists

Wide Format Models:

Epson SureColor P600: Professional-grade 13" wide printing

Epson SureColor P800: Enhanced color accuracy and larger prints

Epson SureColor P900: Top-tier desktop wide format option

Commercial Models:

Epson SureColor F570: Purpose-built for garment printing

Epson SureColor F170: Compact sublimation printer easily converted

The EcoTank series stands out because the continuous ink supply system (CISS) is already built-in, eliminating the need for additional CISS installation. These models handle DTF ink viscosity better and have larger ink reservoirs, reducing refill frequency during production runs.

Key benefits of converting your existing Epson printer

Converting your existing Epson printer to DTF offers significant advantages over purchasing dedicated DTF equipment. The cost savings alone make conversion attractive - a quality DTF printer can cost $3,000-$10,000, while conversion typically runs $200-$800 depending on your printer model.

Your existing printer knowledge transfers directly, eliminating the learning curve associated with new equipment. You already understand its quirks, maintenance requirements, and optimal settings. This familiarity reduces troubleshooting time and increases productivity from day one.

Flexibility remains a major benefit. Unlike dedicated DTF printers, converted Epson printers can switch between regular printing and DTF printing with proper cleaning procedures. This versatility proves invaluable for businesses that need both capabilities.

Space efficiency matters for home-based businesses or small shops. Rather than housing two separate printers, conversion maximizes your existing footprint. The dual-purpose setup frees up workspace for heat presses, storage, or additional equipment.

Quality control stays consistent since you're using familiar hardware. Print settings, color profiles, and maintenance schedules remain similar to your current workflow. This consistency reduces variables when troubleshooting print quality issues.

Essential differences between regular and DTF printing systems

Regular inkjet printing and DTF printing share the same basic mechanical process but differ significantly in materials, settings, and post-processing requirements. Understanding these differences prevents common mistakes during conversion and operation.

Ink Composition:
Regular inks are water-based with low viscosity, designed for paper absorption. DTF inks contain specialized pigments suspended in a thicker medium that doesn't absorb into film. The viscosity difference requires modified printer settings and sometimes hardware adjustments.

Print Surface:
Standard printing uses porous paper that absorbs ink quickly. DTF printing uses non-porous PET film where ink sits on the surface. This fundamental difference affects drying time, color saturation, and print settings.

Color Requirements:
Regular printing uses CMYK (Cyan, Magenta, Yellow, Black) color model. DTF printing adds white ink as a crucial component, creating opacity on dark fabrics. Some setups also include fluorescent colors for special effects.

Post-Processing:
Regular prints are complete after printing. DTF requires powder application while ink is still tacky, followed by curing at specific temperatures. The powder melts and bonds with the ink, creating the adhesive layer that transfers to fabric.

Environmental Factors:
DTF printing is more sensitive to humidity and temperature. The powder application step requires controlled conditions to prevent clumping or uneven coverage. Regular printing tolerates wider environmental variations without quality impacts.

Maintenance Intensity:
DTF inks are more aggressive on printer components. Cleaning cycles need to be more frequent and thorough. White ink, in particular, settles quickly and can cause permanent clogs if the printer sits idle too long.


Essential Tools and Materials for DTF Conversion


Required DTF inks and their specifications

DTF printing demands specialized pigment inks that differ significantly from standard desktop printer cartridges. You'll need cyan, magenta, yellow, and black (CMYK) DTF inks, plus a crucial white ink that serves as the base layer for vibrant colors on dark fabrics. The white ink requires constant circulation to prevent settling, making it the most critical component of your conversion.

Look for DTF inks with particle sizes between 100-200 nanometers for optimal print head compatibility. Water-based pigment inks work best with Epson printers, as they maintain proper viscosity and don't clog the delicate print head nozzles. Quality DTF inks should offer excellent wash durability, typically lasting 50+ wash cycles without significant fading.

Popular DTF ink brands include Dupont, Sensient, and various OEM suppliers. Expect to invest $200-400 for a complete 5-color ink set. Storage temperature matters - keep inks between 59-77°F and shake white ink bottles regularly before use.

DTF film and powder adhesive selection guide

DTF films come in different thicknesses, typically ranging from 0.75mm to 1.2mm. Thinner films (0.75mm) work better for detailed designs and lighter fabrics, while thicker films (1.2mm) provide better durability for heavy-use garments. The film surface features a special coating that accepts DTF inks and releases cleanly during transfer.

Cold-peel films are most beginner-friendly, allowing you to remove the carrier film after the design cools completely. Hot-peel films require immediate removal while warm, offering slightly better hand-feel but demanding more skill and timing.

For powder adhesive, choose polyurethane (PU) based powders over polyvinyl chloride (PVC) options. PU powders create more flexible transfers that move naturally with fabric stretch. Mesh sizes typically range from 80-120 mesh, with finer meshes (120) creating smoother finishes and coarser meshes (80) providing stronger adhesion.

Storage conditions affect both materials. Keep DTF films in their original packaging, stored flat in cool, dry conditions. Powder adhesive should remain sealed and stored below 70°F with low humidity to prevent clumping.

Specialized tools and hardware for the conversion process

Converting your Epson printer requires specific hardware modifications and tools. A Continuous Ink Supply System (CISS) is mandatory for DTF printing, as standard cartridges can't handle the ink volume and white ink circulation requirements. Look for CISS kits designed specifically for your Epson model, complete with external ink tanks, tubing, and circulation pumps.

The white ink circulation system deserves special attention. You'll need a peristaltic pump that runs continuously or on timed intervals to prevent white pigment settling. Some advanced CISS systems include built-in stirring mechanisms or automated circulation cycles.

A precision scale becomes essential for mixing ink ratios and measuring powder application. Digital scales with 0.1-gram accuracy work well for home setups, while commercial operations might need 0.01-gram precision.

Heat press equipment requires specific temperature and pressure capabilities for DTF transfers. Your press should reach 320°F consistently and apply 4-6 bars of pressure. A 15"x15" platen accommodates most DTF projects, though larger platens offer more production flexibility.

Additional tools include:

Powder shaker boxes for even adhesive distribution

Curing ovens or conveyor dryers for powder melting

RIP software for color management and white ink control

Print head cleaning kits and maintenance solutions

Teflon sheets and parchment paper for transfer protection

Quality tools make the difference between frustrating failures and professional results.


Preparing Your Epson Printer for DTF Conversion


Deep cleaning your printer's internal components

Start by powering down your Epson printer and unplugging it from the wall. You'll need to access the internal components, so remove any paper from the trays and open all covers. The cleaning process begins with removing dust and debris that can interfere with DTF printing precision.

Use compressed air to blow out dust from the paper path, focusing on areas around the rollers and feed mechanisms. Pay special attention to the carriage rail where the print head travels back and forth. This metal rod needs to be spotless for smooth operation. Wipe it gently with a lint-free cloth dampened with isopropyl alcohol.

Check the encoder strip, a clear plastic strip with lines that helps the printer track head position. Any smudges or dirt here will cause print quality issues. Clean it carefully with alcohol and a cotton swab, moving in one direction only.

Removing existing ink cartridges and cleaning print heads

Remove all existing ink cartridges and set them aside. You won't be using them again for DTF printing. The print heads need thorough cleaning to remove any residual ink that could mix with your DTF inks and cause color contamination.

Run the printer's built-in head cleaning cycle several times. Most Epson printers have this option in the maintenance menu. After each cycle, print a nozzle check pattern to see if any ink remains. Continue cleaning cycles until the nozzle check shows no ink output.

For stubborn ink residue, remove the print head assembly if your model allows it. Soak it in a cleaning solution designed for inkjet printers for 30 minutes, then rinse with distilled water. Some technicians use a 50/50 mix of distilled water and isopropyl alcohol for this step.

Installing the continuous ink supply system (CISS)

A CISS is essential for DTF printing since you'll be using much more ink than regular printing. Choose a CISS kit specifically designed for your Epson model. Generic kits often cause compatibility issues.

Thread the ink tubes through the side of the printer, making sure they don't interfere with the print head movement. The tubes should have enough slack to allow the carriage to move freely across its full range without pulling or kinking.

Position the external ink tanks at the same height as the print head to maintain proper ink flow pressure. If the tanks are too high, ink will flood the system. Too low, and you'll get air bubbles. Most CISS kits include a level guide to help with placement.

Fill each tank with the corresponding DTF ink color, following the manufacturer's color assignments. Prime the system by gently pulling ink through the tubes until you see ink in the cartridge chambers. Install the CISS cartridges into your printer.

Setting up proper ventilation and workspace requirements

DTF printing requires adequate ventilation due to the chemical nature of the inks and powders involved. Set up your converted printer in a well-ventilated area, ideally with an exhaust fan to remove fumes. Avoid basement locations or enclosed spaces without air circulation.

Your workspace should be level and stable to prevent print head alignment issues. Temperature control matters too – keep the area between 68-75°F for consistent ink flow and powder adhesion. Humidity should stay below 60% to prevent powder clumping.

Install adequate lighting to inspect print quality and troubleshoot issues. LED strips or adjustable desk lamps work well. Keep the area clean and dust-free since particles can contaminate your prints or clog the print heads.

Store your DTF powders and inks away from direct sunlight and heat sources. A dedicated cabinet or shelf system keeps supplies organized and prevents contamination. Consider installing a small dehumidifier if your workspace tends to be humid.


Installing DTF Ink System and Configuration


Filling ink cartridges with DTF-specific inks

DTF inks require precise handling and proper filling techniques to ensure optimal print quality. Start by purchasing high-quality DTF pigment inks specifically designed for your Epson printer model. These inks typically include cyan, magenta, yellow, black, and white - with white being the most critical for DTF applications.

Remove the existing ink cartridges from your printer and drain any remaining OEM ink completely. Clean the cartridges thoroughly with distilled water and allow them to dry completely before proceeding. When filling, use a syringe with a blunt needle to inject DTF ink slowly into each cartridge through the fill holes. Fill each cartridge to approximately 90% capacity, leaving some air space to prevent overflow during temperature changes.

Pay special attention to the white ink cartridge, as white DTF ink tends to settle and requires gentle agitation before filling. Mix the white ink thoroughly but avoid creating air bubbles. Label each cartridge clearly with the corresponding color to prevent confusion during future refills.

Priming the ink system and removing air bubbles

Air bubbles in your ink system will cause print quality issues and potential damage to your printer's print head. Begin the priming process by installing your filled cartridges and running the printer's built-in head cleaning cycle twice. This initial cleaning helps establish ink flow through the system.

Check your printer's maintenance menu for options like "Power Cleaning" or "Initial Fill" - these functions push more ink through the system compared to standard cleaning cycles. Run these intensive cleaning cycles once, then print a nozzle check pattern to identify any missing or misaligned nozzles.

If air bubbles persist, manually prime the system using a syringe connected to the ink lines. Draw ink through the tubes slowly and steadily until you see consistent color flow without air pockets. This process may take several attempts, especially with thicker DTF inks. Print multiple nozzle check patterns between priming attempts to monitor progress.

Calibrating color profiles for optimal DTF output

Color calibration ensures your DTF prints match your design expectations and provides consistent results across different film types. Download ICC color profiles specifically created for DTF printing with your Epson printer model, or create custom profiles using colorimeter hardware and profiling software.

Install the DTF color profiles in your computer's color management system and set them as default for your DTF printing workflow. Adjust your RIP software settings to use these profiles automatically when processing DTF jobs. Test your calibration by printing color swatches and comparing them to known color standards.

Fine-tune your white ink density settings, as this underlayer directly affects color vibrancy and opacity. Start with 80% white ink coverage and adjust based on your film type and heat press requirements. Print test patterns with varying white ink densities to determine the optimal setting for your specific DTF films and transfer conditions.


Software Setup and Print Settings Optimization


Installing DTF-compatible RIP software

The right RIP (Raster Image Processor) software makes or breaks your DTF conversion project. Popular options include AcroRIP, Wasatch, and Caldera, with AcroRIP being the go-to choice for most Epson DTF conversions due to its affordability and user-friendly interface.

Download your chosen RIP software from the official vendor. During installation, select your specific Epson printer model from the supported devices list. Most RIP software packages include pre-configured profiles for common Epson models like the L1800, P600, and ET-15000 series.

After installation, connect your converted printer via USB cable and run the initial setup wizard. The software will automatically detect your printer and install the necessary drivers. Create a new printer configuration by selecting "DTF" as your media type and choosing the appropriate ink configuration based on your conversion setup.

Configuring print quality settings for DTF materials

DTF printing requires specific quality settings that differ significantly from standard paper printing. Access your RIP software's print quality menu and adjust the following critical parameters:

Print Resolution: Set your resolution to 1440x1440 DPI for optimal detail reproduction. Higher resolutions like 2880x1440 DPI can improve quality but significantly increase print times.

Ink Density: Start with 100% ink density for vibrant colors, then adjust based on your film type. Some PET films require reduced density to prevent ink bleeding.

Print Speed: Select "Quality" or "Fine Art" mode instead of "Speed" to ensure proper ink layering. Fast printing can cause poor adhesion between ink layers.

Bi-directional Printing: Disable bi-directional printing to eliminate banding issues common in DTF applications. This setting ensures the print head moves in one direction only, creating more uniform ink coverage.

Setting up color management and ICC profiles

Proper color management ensures consistent, accurate colors across different DTF films and powders. Your RIP software should include DTF-specific ICC profiles, but you may need to download additional profiles from your film manufacturer.

Install ICC profiles by copying them to your system's color profile folder. On Windows, this is typically C:\Windows\System32\spool\drivers\color\. Mac users should place profiles in /Library/ColorSync/Profiles/.

In your RIP software, navigate to the Color Management section and assign the appropriate input and output profiles:

Profile Type Recommended Setting
Input Profile sRGB or Adobe RGB
Output Profile DTF film-specific ICC
Rendering Intent Perceptual or Relative Colorimetric
Black Point Compensation Enabled

Create custom color curves if your prints appear too dark or light. Most RIP software includes curve adjustment tools that let you fine-tune individual color channels.

Testing print alignment and nozzle functionality

Before printing actual designs, run comprehensive tests to verify your printer's mechanical performance. Start with a nozzle check pattern to identify any clogged or misfiring nozzles.

Print the built-in alignment pattern from your RIP software. This test reveals head alignment issues that can cause color registration problems in your DTF prints. If the test shows misalignment, access your printer's maintenance menu and run the automatic head alignment procedure.

Create a custom test pattern that includes:

Solid color blocks to check coverage uniformity

Fine lines and text to verify edge sharpness

Gradient patterns to test smooth color transitions

Registration marks for multi-pass alignment verification

Print this test pattern on your DTF film and examine it closely under good lighting. Look for streaking, banding, or color shifts that indicate hardware or software configuration issues. Repeat tests after each adjustment until you achieve consistent, high-quality output.


Completing Your First DTF Print Test


Loading DTF film correctly into the printer

Getting your DTF film positioned correctly is crucial for a successful print. Start by ensuring your DTF film is at room temperature and free from dust or debris. The film should be loaded with the printable side facing down toward the print heads - this glossy, coated surface is where the ink will adhere.

Adjust your printer's paper guides to fit snugly against the film edges without creating excessive pressure. Most Epson printers have adjustable rear paper guides that should be positioned to prevent the film from shifting during printing. Load the film straight and avoid any wrinkles or bends that could cause print head strikes.

Set your printer's paper type to "Premium Glossy Photo Paper" or "Ultra Premium Photo Paper Luster" in your printer settings. This tells the printer to maintain proper distance from the film surface and prevents potential damage to your newly installed DTF ink system.

Executing a test print with proper settings

Your first test print should be simple but comprehensive enough to evaluate your conversion success. Create a test design that includes solid color blocks, gradients, fine lines, and small text. This combination will reveal any issues with color accuracy, print head alignment, or ink flow.

Open your DTF-specific RIP software and load your test image. Set your print resolution to 1440x720 DPI for the initial test - this provides excellent quality while maintaining reasonable print speeds. Choose "Unidirectional" printing mode to ensure maximum precision, though this will increase print time.

Configure your color management settings to use the DTF ink profile that came with your ink system. Disable any printer driver color management to prevent double color correction. Set your ink density to 100% initially - you can adjust this down to 80-85% in future prints if you notice excessive ink usage.

Print your test file and immediately inspect the wet print for any obvious issues like missing colors, streaking, or uneven coverage.

Applying hot melt powder and curing process

The powder application step determines your transfer's durability and washability. Work quickly after printing since DTF inks have a limited working time before they begin to skin over. Use a powder shaker or fine mesh sifter to apply an even coat of hot melt adhesive powder across the entire printed area.

Shake off excess powder by gently tapping the film from behind. The powder should only adhere to the printed areas where the ink is still tacky. Any powder on unprinted areas will create unwanted adhesion during pressing.

Move your powdered print to your curing oven or heat press immediately. Set your curing temperature to 338-356°F (170-180°C) for 2-3 minutes. The powder will melt and become glossy when properly cured. You'll know it's ready when the powder transforms from a matte finish to a shiny, plastic-like appearance that's cool to the touch.

Heat pressing the final transfer onto fabric

Choose a test fabric that represents your typical projects - cotton or cotton blends work best for initial testing. Preheat your fabric to 320°F (160°C) for 5-10 seconds to remove moisture and wrinkles.

Position your cured DTF transfer face-down on the fabric with the film side up. Apply medium pressure at 320°F for 15-20 seconds. The pressing time and temperature may vary slightly depending on your specific ink and powder combination, so keep detailed notes for future reference.

After pressing, allow the transfer to cool for 30-60 seconds before attempting to peel. The film should remove cleanly, leaving behind a vibrant, well-adhered design. Check for any areas where the transfer didn't fully adhere - these spots will appear dull or may peel up at the edges.

Test the durability by performing a stretch test and washing a small corner of the fabric. A properly executed DTF print should withstand normal washing and wearing without cracking or peeling.


Troubleshooting Common DTF Conversion Issues


A. Resolving ink flow and clogging problems

Ink flow issues rank among the most frustrating problems you'll face during DTF conversion. When your printer sits idle for extended periods, the DTF inks can thicken and create blockages in the print heads and lines. Start by checking your ink lines for air bubbles, which often appear as small pockets that interrupt the smooth flow of ink from reservoir to print head.

Run a nozzle check pattern first to identify which colors are experiencing problems. You'll see gaps or streaks in the pattern where clogs exist. For minor clogs, use your printer's built-in cleaning cycles - run them 2-3 times with 10-minute intervals between each cycle. This gives the cleaning solution time to work on stubborn deposits.

For severe blockages, manual cleaning becomes necessary. Remove the print heads carefully and soak them in distilled water for 30 minutes. Avoid tap water as minerals can worsen clogs. Use a syringe with cleaning solution to flush ink lines, working slowly to avoid damaging delicate components.

Preventive measures work better than fixes:

Never let your printer sit unused for more than 3 days

Run weekly cleaning cycles even during inactive periods

Keep ink reservoirs sealed when not in use

Store your printer in a dust-free environment

Check ink levels regularly to prevent running dry

White ink presents special challenges since it contains heavier pigments that settle quickly. Shake white ink cartridges gently before installation and consider installing an agitation system if you print frequently.

B. Fixing print quality and color accuracy issues

Color accuracy problems in DTF printing often stem from incorrect ICC profiles or mismatched ink formulations. Your converted Epson printer needs specific color profiles designed for DTF inks, not the original manufacturer profiles. Download ICC profiles from your ink supplier - generic profiles rarely deliver acceptable results.

Banding appears as horizontal lines across your prints and usually indicates uneven ink flow or print head alignment issues. Check that your DTF film feeds smoothly without catching or skipping. Clean the platen and feed rollers with isopropyl alcohol to remove any adhesive residue that might cause irregular feeding.

Common print quality fixes:

Issue Likely Cause Solution
Faded colors Low ink density settings Increase ink saturation in RIP software
Color bleeding Excessive ink application Reduce ink limits and pass count
Grainy texture Wrong print resolution Switch to 1440x1440 DPI or higher
Streaky prints Dirty print heads Run deep cleaning cycle

Print head height adjustment affects ink droplet placement on the film. Set the height too low and you risk head strikes against the film surface. Too high creates fuzzy, imprecise prints. Most DTF films work best with a 1.5mm head gap, but test different settings with your specific film brand.

Temperature and humidity dramatically impact print quality. DTF inks perform best in environments between 68-75°F with 45-55% humidity. Install a dehumidifier if you live in a humid climate, as excess moisture causes colors to bleed and reduces adhesion powder effectiveness.

C. Addressing film feeding and alignment challenges

Film feeding problems can destroy expensive DTF film and waste hours of printing time. Start by examining your film path for any obstructions or debris. DTF films are more sensitive than regular paper, so even small particles can cause jams or tears.

Adjust your printer's paper thickness settings to accommodate DTF film specifications. Most DTF films measure between 75-100 microns thick, significantly different from standard photo papers. Wrong thickness settings cause the printer to grip too tightly or too loosely, creating feeding inconsistencies.

Film alignment troubleshooting steps:

Check that film edges are perfectly straight and not curled

Verify the film guide rails are properly positioned

Clean feed rollers with lint-free cloths and alcohol

Test with a small piece of film before committing to large prints

Ensure the film roll unwinds smoothly without tension

Manual feeding works better than auto-feeding for many DTF applications. Hand-guide the film into the printer while holding slight tension to prevent skewing. This technique gives you more control over film placement and reduces waste from misaligned prints.

Storage conditions affect film performance significantly. Keep DTF film rolls in their original packaging until use, stored vertically in a cool, dry location. Avoid temperature fluctuations that can cause the film to expand or contract, leading to feeding problems.

Static electricity buildup creates havoc with thin DTF films. Install anti-static bars near your printer or use anti-static spray on the film surface. Ground yourself before handling film to prevent static discharge that can attract dust particles or cause the film to cling to printer components.


Conclusion


Converting your Epson printer for DTF printing opens up exciting possibilities for custom apparel and creative projects. You've learned about printer compatibility, gathered the right tools and materials, and walked through each step from installing the DTF ink system to optimizing your print settings. The process might seem complex at first, but breaking it down into these manageable steps makes it much more achievable.

Once you complete your first successful test print, you'll have a powerful DTF setup that can produce professional-quality transfers. Remember to take your time with each step, especially during the ink system installation and software configuration. When issues pop up, the troubleshooting tips will help you get back on track quickly. Start with simple designs for your first few prints, then gradually work your way up to more complex projects as you become comfortable with your newly converted printer.


Reading next

Complete Guide: How to Press DTF Transfers for Perfect Results Every Time
DTF Transfers with Cricut EasyPress – Is It Possible?

Leave a comment

This site is protected by hCaptcha and the hCaptcha Privacy Policy and Terms of Service apply.