Iron Instructions Tipping DTF Transfers.
Create your own original designs and turn them into professional-quality apparel. The five steps below will ensure that you get flawless results whenever you use your DTF transfers.
Step 1: Setup and Preparation
Prepare your working space on a strong and smooth surface, such as an ironing board or a strong table. Take your temperature control, DTF transfer, target garment, parchment paper or protective sheet, and your household iron. Heat your iron to the proper level of temperature depending on the fabric. Polyester fabrics are effective at 275-300 °C, cotton and cotton blends at 320-350 °C, and heavy cotton and denim at 350-375 °C. Never leave your steam option on your iron because water may affect proper adhesion. Ensure that you have a clean garment that is free of wrinkles, and then you should start the application procedure.

Step 2: Position the Transfer
Lay the garment flat on a work surface that you have prepared, and place the DTF transfer where you want the final design to be. Be careful to make sure that the transfer is straight and that it is centered on the garment. It must be applied face down on the surface of a fabric with the printed part facing down. You should carefully check the positioning before continuing the process because once the transfer and garment are pressed, repositioning them will destroy them.
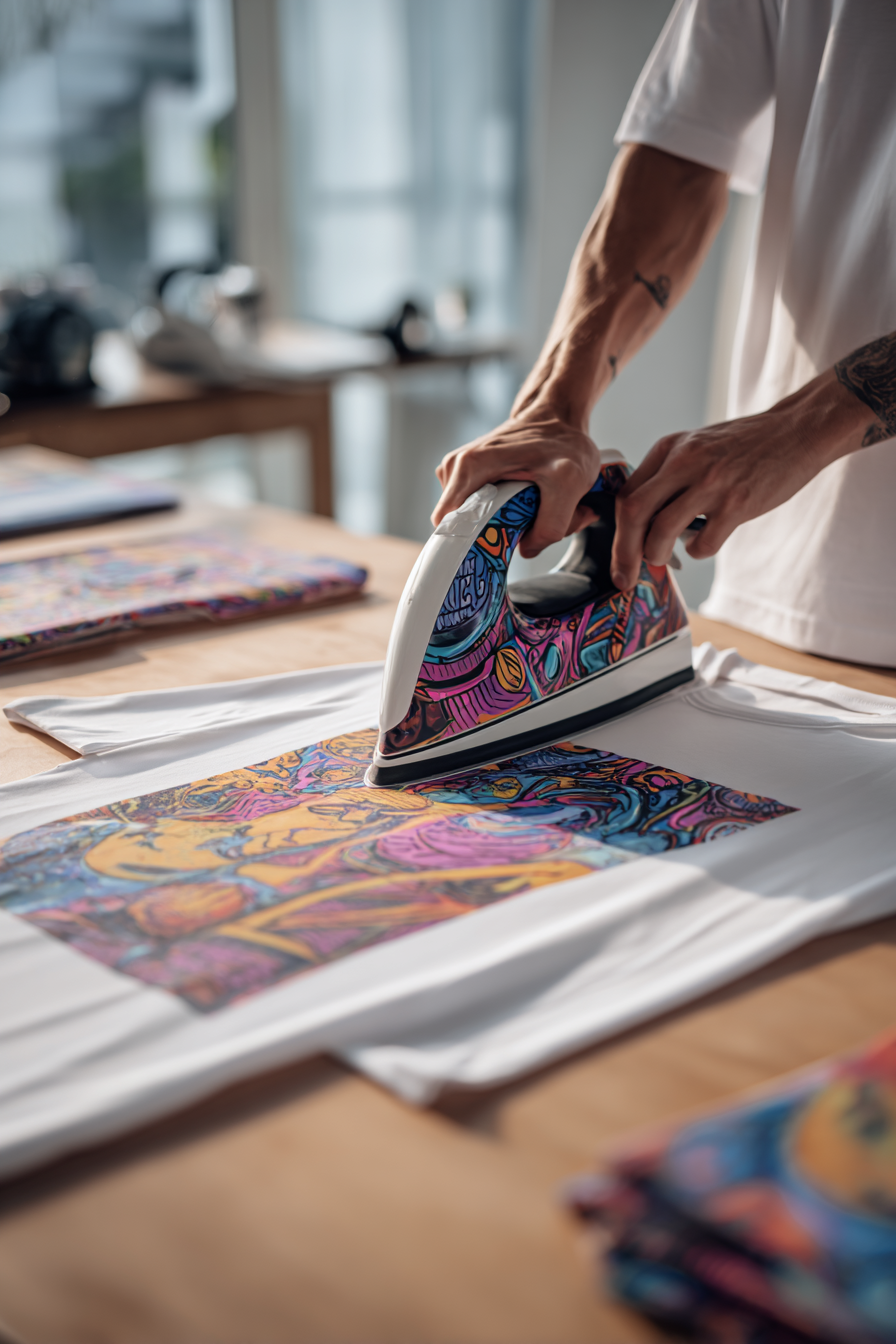
Step 3: Press the Transfer
Cover the laid-down transfer with parchment paper or a protective sheet to preserve your iron and also the surface on which the transfer is to be made. Place the iron on hard, firm, and even pressure and leave the iron without moving it for 20-25 seconds. Keep the downward force constant during the entire pressing time in order to have a consistent distribution of heat and adhesion. During pressing, make the iron move a bit in small circle movements to make sure that there is even heat coverage on all the design area. In case of a big design, do it in parts so that it is fully covered.
Step 4: Peel and Final Press
Once the iron has been pressed, leave the iron and allow it to cool slightly for 5-10 seconds. Slowly peel off a tiny part of the transfer film to check the level of adherence of the design to the fabric. When the design is not completely stuck, press again after 10-15 seconds with more pressure. After satisfying with the adhesion, peel the whole carrier film when the transfer is still hot. Keep parchment paper on the freshly pressed pattern with the light to medium pressure for 15-20 seconds. This last stamping step increases the life of the transfer as well as eliminates the unwanted surface shine.
Step 5: Cool and Care
Ensure that the garment is completely cooled before handling and wearing. Do not wash the freshly pressed clothes immediately: leave them at least 24 hours so that the transfer has time to cure and bind to the fibers of the clothes. Washing: Do not use cold water and do not use harsh cycles; wash garments inside out. Do not use bleach or fabric softeners; these chemicals may destroy the transfer adhesive in the course of time. Air drying is the best method of drying clothes, but when it comes to machine dryers, they should be put on low heat, and one should make sure that the garment is inside it.
Troubleshooting
In the event that transfers are not adhering correctly, increase the temperature by 25°F at a time and press with greater force. In the case of partial design lifting, place the carrier film on top of the problem areas again and apply more heat and pressure. In case designs seem dull or faded, make sure that protective films are removed totally and a little more pressure is applied. When you are working with new materials, it is always good to have a test run on scrap pieces of fabric before you end up ruining your end product.
Explore More with EZT Mart & EZDTF Maker
At EZDTF Maker, we provide everything you need to bring your designs to life — from blank apparel to premium DTF and UV DTF printing supplies. Start with our apparel mart, then explore our full range of transfers, bundles, and materials.
🛍 Shop Apparel & Blanks
Begin your printing journey with high-quality apparel from our dedicated store:
👉 EZT Mart – Your destination for blank apparel, fashion basics, and accessories ready for customization.
Custom Transfers & Builders
Custom DTF Transfers by Size – Perfectly sized transfers for any project.
DTF Gang Sheet Builder – Combine multiple designs into one efficient sheet.
Upload Your Gang Sheets – Quick uploads for fast turnaround.
Holiday & Seasonal Transfers – Ready-to-press designs for special occasions.
UV DTF Gang Sheet Builder – Create vibrant and durable UV DTF stickers.
Bundles & Supplies
DTF Supplies Bundle | UV DTF Supplies Bundle – All-in-one solutions for your printing setup.
Premium DTF Ink | DTF TPU Powder | DTF Film Rolls – Reliable supplies for flawless results.
UV DTF Ink | Premium UV DTF Film – High-quality UV materials for lasting designs.
Try Before You Buy
Not sure yet? Experience our quality firsthand with a Free DTF Transfer Sample Pack.